New Title
New Paragraph
New Paragraph
New Paragraph
New Title
Follow us
Hinged Tele Support Board


Note: The construction article mainly shows the LX200. The system can be constructed using either the LX200 or the LX600, and will work with both scopes. (For the LX600, you need to cut the hole in the hinged board for the counterweights.) As shown in the two photos above, the telescopes are arranged differently when constructing and using the system. The LX200 is turned so the tube points toward the UPPER end of the hinged board, with the finder scope on the side away from the board. The LX600 is turned so the tube points toward the LOWER end of the board, with the finder and starlock on the side away from the board, and the counterweights extending through the hole in the board.
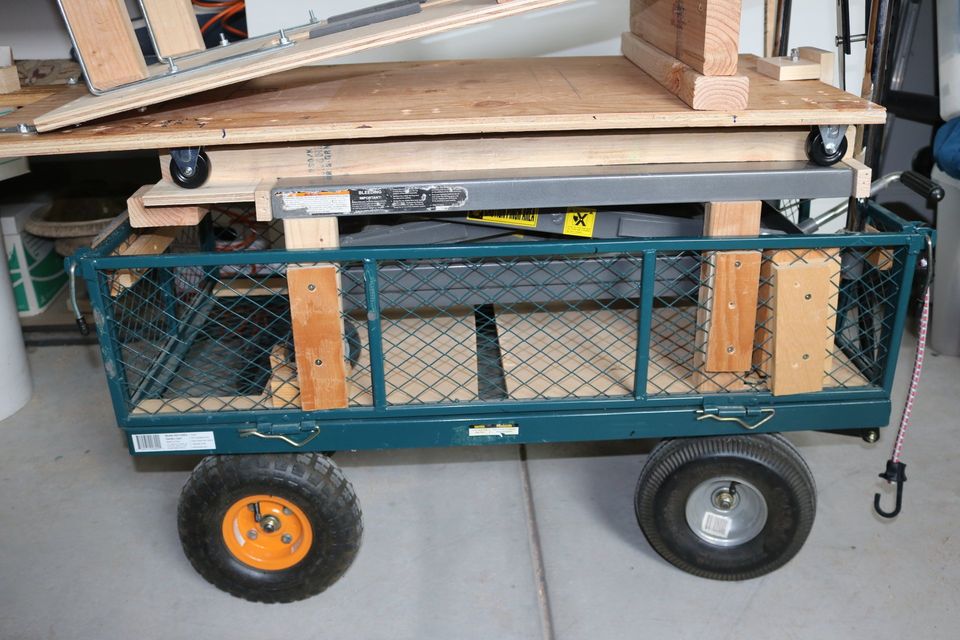
The support board has four 2" casters on the bottom for rolling the telescope to or from your vehicle, and the hinged section allows you to safely and easily raise the telescope onto the tripod, and transfer it to back to the cart. I recommend substituting 2-1/2" casters.

The hinged support board is CRITICAL to the system. Many dimensions are shown on the picture above. But it is MUCH SAFER to build the hinged support board "in situ" (in place) using the telescope on the tripod as a guide, and following the steps given in the video and video script below.
You can print the video script below as a reference.
You can safely start with these steps (if using the specified lift table, garden cart, and the LX200 or LX600 telescopes.)
Use 3/4" plywood. Cut the hinged board to 19-1/2 x 43 inches, the base support board to 19-1/2 x 54 inches.
It is NOT NECESSARY to reduce the width of the base board at the end with the forks. (The above picture is incorrect.)
Use a jig saw to cut the fork in the center of one end 6-1/4" long and 8-1/4 inches wide as shown in the picture above.
Don't mount the hinges or braces before watching the video.
This video shows how to construct the Telescope Support Board
Build the Lift Table Frame next.
Lift Table Frame
Mounting the casters. The board is supported by 4 2" casters, placed as far apart as possible to stably support the telescope. (I recommend you substitute 2-1/2" casters.)
(photo above) Place the support board on the cart, centered from side to side, with the front end extending 3/4" past the metal top (toward the lift table handle). It's easier to position the casters with a combo-square.
Place the casters under the board against the 2x2s as shown in the picture, with their flanges up. Measure underneath the base board from the board edge to the caster flange. Mark lines for the casters on top of the board, but move the line 1/8" toward the edge. Mark on the top where the ends of the flanges are. Place the casters on top, on the marks, and drill mounting holes through the holes in the flanges. Mount the casters on the bottom of the board with 1-1/4" #10-24 machine screws inserted through the top of the board. DO NOT put washers under the nuts!
Mount Locking Brace.
The locking brace prevents the support board from rolling off the lift table while moving the cart.

(see picture above)
Place the telescope support board on the lift table, with the front end of the board over the 1x2 at the front end of the cart.
Cut a 1x4 piece 2-1/2" long, place it on top of the support board as shown, with 2 thick washers side by side under it for clearance. Don't remove them until the brace is finished.
Cut the vertical 1x4, mark it's position on the 1x2 at the end of the lift table.
Remove the 1x2, attach the vertical piece of 1x4 to the 1x2 using 2 2" 1/4" flat head bolts countersunk and inserted from the back side of the 1x2.
Replace the 1x2, screw the 1x4 on top to the vertical 1x4 with flat head, countersunk wood screws.
Remove the washers that are under the 1x4.
Drill a 1/4" diam hole in the middle of the top 1x4, 1" from the vertical 1x4, through both the 1x4 and the support board.
Enlarge the hole in the support board so it is rectangular, and 1" wide.
Put a nut near the top of a 2-1/2" 1/4" bolt so it'll be easy to remove, insert it to prevent the telescope from rolling off the cart when moving the cart.
Enlarge the hole in the support board slightly if you have trouble inserting the bolt.